

How To Create A Windows 7 Boot Usb On Mac

Although Windows 7 has run its grade and currently doesn't take whatever kind of technical support from Microsoft unless you're willing to pay a hefty fee, a lot of Windows users all the same refuse to surrender their Windows 7. Fortunately, even if you don't want to use Boot Military camp Assistant for this process, if yous want to create a bootable Windows seven USB on a Mac without Bootcamp, there are several options bachelor to you. One method is to try and apply Terminal commands to create Windows bootable USB, and in that location are a couple of tools y'all can practice to achieve the same results besides. This article shows you lot all three means in a stepwise fashion so y'all can replicate it on your Mac.
Strangely enough, Microsoft is notwithstanding providing the ISO file for Windows seven, which you can download for costless right here. The merely catch is that yous'll need to verify your production key before downloading. If you can't find that, here's a valuable resources to apply third-political party tool for downloading Windows 7 ISO. Once you have the ISO file in hand, endeavor these iii methods to create Windows vii bootable USB on Mac without Bootcamp.
- Create Windows 7 Bootable USB on Mac #1: DD Command
- Create Windows 7 Bootable USB on Mac #2: UUByte ISO Editor
- Create Windows 7 Bootable USB on Mac #3: Balena Etcher
Create Windows vii Bootable USB on Mac #1: DD Command in Terminal
Mac is congenital on Unix kernel fundamentally so all tasks being done in GUI interface can be done via plain text command. This also applies to create Windows seven bootable USB on Mac. However, at that place are several commands combined in society to do this successfully. If you were not comfy with text commands, and then it is totally understandable. Please movement to Part 2 instead, which utilizes a much easier solution. The following steps bear witness yous what to practise with Final app when you have your ISO file ready and the USB bulldoze inserted into the Mac.
Step 1: Open Terminal app in Mac from the Utilities folder within the primary Applications folder.
Step 2: The first control lists out all the drive volumes that your Mac's difficult bulldoze contains: diskutil listing
Stride iii: Based on your results, note downwardly the Identifier corresponding to your USB drive. Y'all should be able to spot it based on the size of the bulldoze, equally shown in the screenshot below.
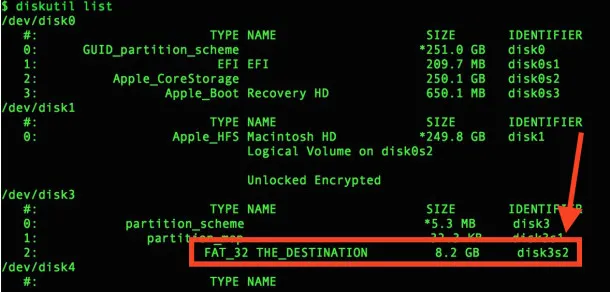
Step four: As shown in the example, the Identifier is disk3s2, which means your next command to unmount the drive volition look like this:
sudo umount /dev/disk3s2
Step five: The next pace is to format the bulldoze and put the Windows 7 ISO file on it. They can be washed together using this command below:
sudo dd if=~/Desktop/Windows7_SP2_EN-United states.iso of=/dev/rdisk3s2 bs=1m
Step half-dozen: After the burning is complete, you lot'll need to eject the USB drive with this command: diskutil eject /dev/disk3s2
The only trouble here is that you won't see a progress bar telling you lot how long it will accept or when information technology's done and so just give it a few minutes before using the squirt command. If you'd rather not mess about with Final and make changes that you might not be able to revert, why not try a complimentary utility like UUByte ISO Editor or Balena Etcher? Both are great for making Windows bootable USB on Mac, and both are explained in subsequent sections.
Create Windows vii Bootable USB on Mac #two: UUByte ISO Editor without Bootcamp
Unlike text control, UUByte ISO Editor is an amazing app built with fancy UI. It is a robust ISO direction toolkit that allows y'all to burn down, edit, copy, and do other actions with deejay image files. It's convenient and popular because you don't need any technical expertise to use it, and it is flexible considering yous can create bootable USB as well as bootable physical disks like DVD.
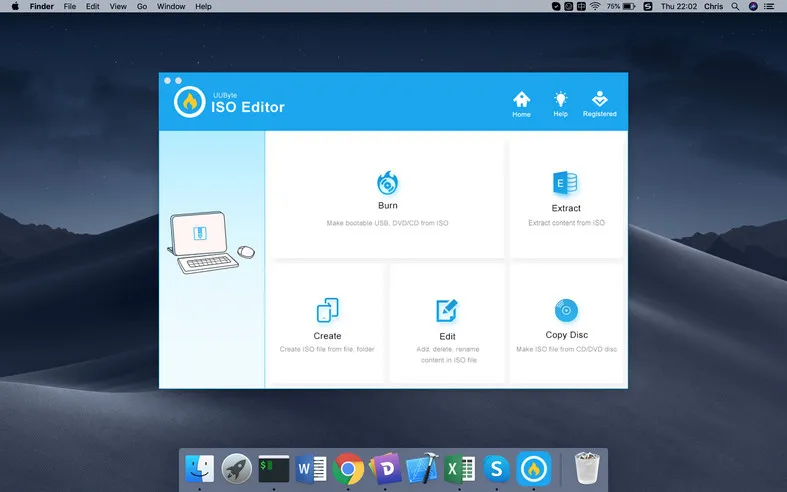
Step 1: Install UUByte ISO Editor on Mac and Insert USB Drive
One time y'all install the software, insert your USB drive and launch the awarding. You will come across the following interface once the app is opened.
Step ii: Load Windows seven ISO
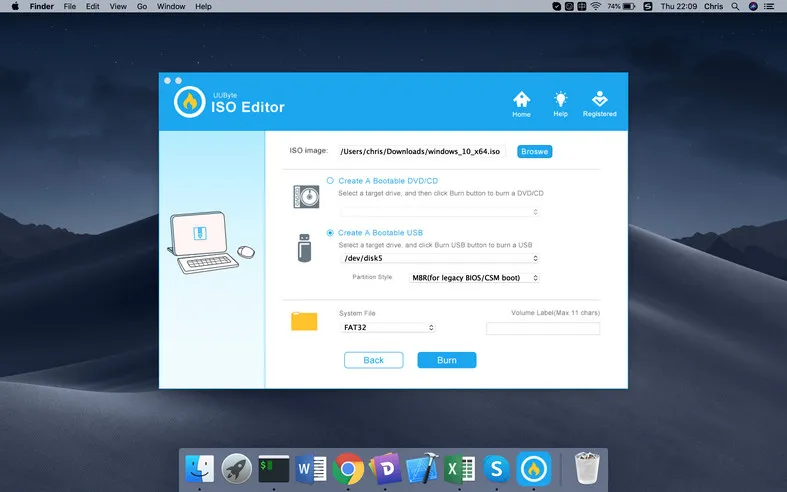
The software recognizes your USB and prepares it for called-for when you click the Burn module on the principal page. You can leave all the settings in default mode; all you need to exercise is import your ISO file for Windows 7 using the Browse selection.
Pace iii: First Creating Windows 7Bootable USB on Mac
Finally, click the Burn button to format the disk and create the bootable media from imported Windows vii ISO file. Make sure Mac won't go into sleep during this process (around vii minutes).

In a few minutes, your USB installer for Windows seven is ready to use for installations, repairs, and and then on. The slick interface and uncomplicated controls entreatment to a lot of users who don't take any experience creating bootable media or working with ISO files. In improver, if you're comfy with that, then you lot get all the tools you need to dispense your disk image files, including extracting content, adding and removing files, copying physical disks to ISO, and, of course, called-for ISO to USB drives.
Create Windows 7 Bootable USB on Mac #three: Balena Etcher
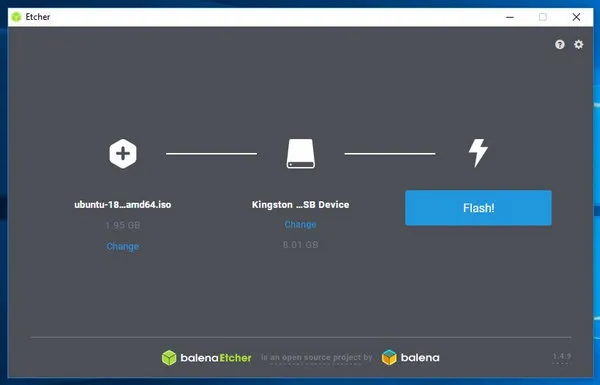
In its newest avatar, Etcher is an every bit like shooting fish in a barrel open-source tool to use that lets you 'flash' an Os image to a USB drive or another storage device like an SD bill of fare to be able to use it as an installer. As you tin run across from the screenshot, the user interface is very uncomplicated. Only a couple icons and buttons displayed on a unmarried folio. No additional settings bachelor!
How to create Windows 7 bootable USB on Mac Using Etcher: Download Balena Etcher dmg file from this website and install information technology on your Mac. Then insert the USB drive on which you desire the ISO file to be burned or flashed. In the chief interface, click the showtime icon to select Windows seven ISO file. Next, select the USB bulldoze by clicking on the icon. You can leave the settings in default values and hit the Flash! icon to kickoff called-for the ISO to USB. At present, waiting for the burning process to exist washed. Co-ordinate to our test event, the time is 3X more than UUByte ISO Editor.
Etcher is a bang-up tool to flash Linux ISO to SD carte and USB drive. The support is non that good for Windows and macOS. And the user interface is purely built-on javascript so the install file is much larger and take at least double time for burning ISO to USB.
Decision:
All of these are simple tools to create Windows 7 bootable USB on Mac simply the start one is a little complicated. Etcher is a nifty utility but doesn't have all the added functionality of UUByte ISO Editor, which nosotros officially recommend every bit the all-time tool to create a bootable Windows 7 USB on Mac without Bootcamp.
Petty is editor in chief at UUByte and writes various topics about Windows and Mac to aid people brand the most of current technology.
Source: https://www.uubyte.com/create-windows-7-bootable-on-mac.html
Posted by: duartedenjudd67.blogspot.com
0 Response to "How To Create A Windows 7 Boot Usb On Mac"
Post a Comment