

How To Clean Homeright Finish Max Paint Sprayer
Disclosure: HomeRight provided me with their Finish Max paint sprayer to review, but all the opinions and words in this post are my own! I had already heard great things about the Finish Max paint sprayer, so I am beyond excited that HomeRight partnered with me on this project! I'm committed to only sharing products I really truly love (you can read my full blogging disclosure here), and this one fit the bill perfectly!
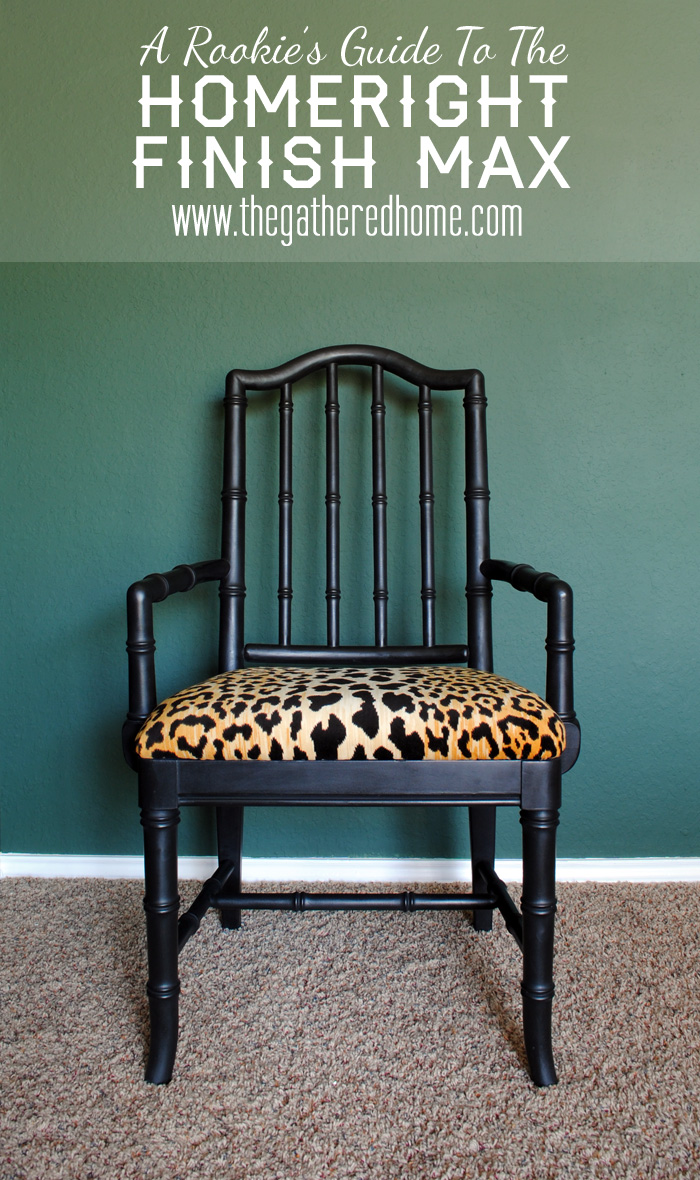
In yesterday's post, I mentioned that I planned to paint my vintage Chinese chippendale chairs ever since purchasing them, but at first I was uncertain about how to go about it. The faux bamboo details create lots of nooks and crannies that would be difficult to paint with a brush, and I was daunted at the idea of having to spray paint all six chairs – if you've ever suffered from spray-paint-trigger-finger, you'll know why!
Still, the awful speckled finish needed to be dealt with…

I'm not being overdramatic (okay, well, when I am ever *not* overdramatic) when I say that the Finish Max Fine Finish HVLP sprayer* from HomeRight saved the day! I was pretty stinking excited to get this package in the mail…
*Affiliate links – in case you like to purchase your DIY supplies from the couch 🙂

So today I'd like to take you on a step-by-step walkthrough tutorial on the HomeRight Finish Max Fine Finish HVLP Sprayer!
Are you ready?!
Step 1: Open the Box…

Good, very good! Look at you, unpacking that box like a paint-sprayin' pro!
Step 2: Familiarize yourself with the Finish Max Sprayer.
As of last week, I was a complete paint-sprayer noob. Never touched one before this. Had no idea what I was doing. If you too are a paint-sprayer-rookie, getting to know your new paint sprayer is an important step!
First, read the included instruction booklet (succinct and helpful). I'd also suggest watching this tutorial from Cheryl at That's What Che Said – I'm not a huge video tutorial person, but both of these videos were great introductions to the Finish Max and I found the visuals very helpful!
Step 3: Prep your paint space.
I decided to spray the chairs in my garage since it's been pretty windy around here lately. I taped plastic tarps up on one wall, and then used cardboard boxes (it seems like we still have a million left over from our move last year) to cover the floor.

Optional: make Dexter jokes. #DIYismurder.
Step 4: Prep your piece(s).
I used a TSP substitute (I have no real reason for choosing this over TSP other than the fact that it was already mixed up for me!), a sponge, and a pair of gloves to wipe down every inch of my chairs. This step cleans and deglosses the surface so the paint will stick better!

Step 5: Lay out all your supplies.

1. Finish Max Sprayer
2. Paint/Primer – First, I used a quart of Rustoleum gray primer. For the final color, I used Glidden interior flat paint in basic black. Remember how I had all that flat black paint leftover from painting the brick fireplace? 😉
3. Container filled with clean water – thanks to Gail from My Repurposed Life for this genius tip: put all your paint-covered tools in water when not in use to keep the paint from drying!
4. Paint stir stick
5. Ladle
6. Viscosity cup – (included with the Finish Max) used to make sure your paint is thin enough.
7. Paintbrushes – large and small to to take care of wet paint drips/runs.
Not pictured: extension cord.
Step 6: Fill the paint reservoir.
Use the ladle to add paint and water to the sprayer reservoir – this is when you will use the viscosity cup and the included instructions to see if or how much your paint needs to be thinned. Think chocolate milk (the yummy pre-bottled kind!). Mix thoroughly.

Important note: when the instructions say to strain the paint (if it isn't a brand new can), strain the paint. My primer was unopened and gave me no trouble, but the black paint was a few weeks old. I didn't have a strainer at hand, so I decided to use it anyway ("How bad can it really be?")… And let's just say it did end up causing problems. Rookie mistake.
7. Paint!
I know, I know – the step we've all be waiting for! You've screwed the paint reservoir cup into the paint sprayer, plugged it in, chosen your paint spraying pattern (consult the instruction manual), and now you're ready to pull the trigger.
Don't forget your safety gear! Paint-snot is no joke – also, I'm pretty sure you don't want to be breathing it into your lungs either. (Super secret pro-tip that I guarantee none of the other DIYers will tell you: Brush your teeth before putting on your mask, or you'll be smelling your last meal all day… No bueno. You're welcome.)

Here are a couple of things to remember:
– Hold the sprayer 4-10 inches away from the piece you are painting.
– Start and finish spraying OFF the edge of your piece.
– Move the sprayer with your arm in a straight horizantal/vertical line WITHOUT turning your wrist.
– Don't stop in one place – that's how you get drips!
– Don't go for perfect coverage the first time through – you want multiple thin, even coats to – again – avoid drips.
Here are my chairs after the primer coat, which I sprayed on more heavily than was necessary (read: drips.)

I'm so glad I decided to spray a primer coat onto these chairs though!
A) I wanted to make sure that I had the perfect recipe for success and that they wouldn't start chipping away and looking like crap right after I finished putting all this work into them.
B) I wanted to get the hang of my new sprayer. It was great to start off with a primer coat that let me iron out any rookie paint sprayer hiccups before moving onto the big leagues.
Perfecting my distance, arm movements, and spray pattern took a little getting used to, but I'm happy to report that even though it was my very first attempt at using a paint sprayer ever, I had very few issues with drips!
Where I did have a few issues with paint running (my fault for letting the sprayer stay in one area for two long), I tried two approaches with them:
1) Use your paintbrush to smooth out the drips while the paint is still wet.
2) Wait for the paint to dry, then use a sanding sponge or extra fine steel wool to sand down the drips.
In this picture, you can see any area where I noticed a drip while the paint was wet, used a brush to smooth it out, but then had to go back with my sanding sponge to smooth it out further. My preference now is to just wait for everything to dry, and then use the sanding sponge/steel wool.

When it was time to start spraying my actual paint color, I did much lighter coats than I had with the primer.
This is what the chairs looked like after one coat:

My approach was:
1) Spray the front of the chairs. Let dry.
2) Spray the back of the chairs. Let dry.
3) Spray the right side of the chairs. Let dry.
4) Spray the left side of the chairs. Let dry.
5) Repeat steps 1-4 again. Let dry.
6) Lay the chairs on their back to reach any areas that were missed. Let dry.
7) Touch up little nooks and crannies with a small paintbrush.*
See step number 7 up there? That's because I'm lazy. 😉
After step 6, it was pretty late in the day so I just decided to call it a day and washed out the sprayer and picked up all my supplies. I could have done one more coat with the Finish Max the next day to be sure that all the little nooks and crannies in the chair spindles were covered, but I didn't feel like mixing more paint for one last coat. So I just grabbed a small craft paint brush and went over each chair with a critical eye for touch ups.
Also, do you notice all that drying time up there? I'd say I allowed around 30 minutes between each coat, since I wasn't overlapping too much. If you're going over a previously painted area, you want to be sure it's completely dry.
Here's my tip for preventing paint from drying on the spray nozzle of the Finish Max while you're waiting: keep a few q-tips on hand to swab paint off the nozzle any time it starts to build up!
8. Clean up.
Of course, you'll need to wash out your Finish Max in between paint colors and days of use, but it is much easier than you might think – watch this video from Gail at My Repurposed Life to see just how simple it is to clean up! 10 minutes, max.
9. Finish up & admire your work.
Once all the paint had dried, I went over the chairs with extra fine steel wool to make sure everything was smooth. There were some places that were a little bumpy from the overspray from another chair, but a light touch with the steel wool soon had everything sleek and smooth.
I really wanted to maintain the satiny-matte finish of the flat paint, so I hand rubbed each chair with some paste finishing wax.

The finishing wax added a slight sheen to the paint and darkened the color just a little bit. Here you can see the waxed and unwaxed chairs side by side. It's subtle, but made a big difference in person:

Look how buttery smooth the finish on these chairs came out! It looks and feels like a factory finish and is something I could have never hoped to accomplish with a paint brush!


In Summary…
I really like the Finish Max*. Like, a lot. It's easy to use and the results are far better than a brush, roller, or can of spray paint, in my opinion! I also love that the Finish Max is plug and play – no air compressor required! I will definitely be pulling my new bff Finish Max out again and again for painting projects, and now I won't shy away from tackling painting projects because they're too detailed!
If you've ever been intimidated by the thought of using a paint sprayer (Eek! Power tools!), let me assure you that if I can do it – you can too!
Can you blow dry your hair? Then you can use a paint sprayer!
Note: The Gathered Home does not recommend using a paint sprayer to blow dry your hair or vice versa. Don't try to pretend you got the idea from me!
Well, that's all for today! I hope you found this walkthrough helpful! If you have any questions about the Finish Max, I'd love to try and answer them for you! So 'fess up: are you a paint sprayer rookie like me, or a total pro? Let's chat!

How To Clean Homeright Finish Max Paint Sprayer
Source: https://www.thegatheredhome.com/a-rookies-guide-to-homeright-finish-max/
Posted by: duartedenjudd67.blogspot.com
0 Response to "How To Clean Homeright Finish Max Paint Sprayer"
Post a Comment